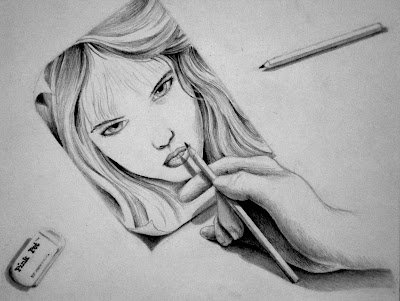
For the person who is just starting out and learning to draw, I feel it necessary to run through a few basics on using the pencil, and to discuss some skills to practice to make learning to draw better and easier. Also it must be said that any web site that dares to call itself "Drawing Tutorials" shouldn't assume that all its readers are at the intermediate level (or above) in drawing ability. This assumption would result in neglecting essential discussions on the basics of drawing, and in the process leave a number of people feeling left out.
How often have you heard the line: "I wasn't born with that talent", in reference to drawing ability? I am of the mind that anyone can learn to draw, and you don't need to be born with any artistic talent. Artistic ability isn't passed through genetics or DNA, it is learned. Personally, I can attest that when I picked up that first crayon or marker as a toddler, I couldn't draw. At the time I loved the marks that I made on the wall, but my mother wasn't so amused!
All one has to do to learn to draw is possess the willingness to put in the time to practice drawing. What I wish to set forth with this blog is to impart the basic skills to learn for the beginner, as well as give instruction to the intermediate student of drawing.
There are a few things of note about the drawing pencil and using it to draw. The beginner may not be aware of the differing types of pencils used in drawing.
There are several different drawing pencils with varying degrees of hardness and softness of the graphite (lead) contained within. Marking this on the pencil is a number followed by H or B. 'H' pencils are hard, starting with HB, which is the "softest" of the hard pencils, and going up to 9H, which is the hardest lead. These 'H' pencils are widely used by drafters, designers and architects where fine lines are necessary in the drawing of building plans or designing blueprints of all things mechanical.
Then on the opposite spectrum, there are the 'B' pencils, which are soft; very suitable for drawing and sketching. In my drawing, I never use a pencil harder than an HB, which combines elements of both hardness and softness together and is the mid point of pencils in the spectrum, before going softer on one end, and harder on the other.
Some artists prefer to do their preliminary sketches (the basic outline of a drawing) with an HB pencil, I prefer to use a 2B pencil for this purpose. The 'B' pencils start at B, then go on to 2B, 3B, 4B, and so on, and stopping with 9B, which is very soft! The 9B can produce some rich darks. For all of the tutorials on graphite drawing, we will be using mainly HB, 2B, 4B, 6B and 8B pencils. This selection is a personal preference; after some time, the developing artist may discover their own tastes regarding pencils, and that is certainly okay. If one feels that the use of another grade of of pencil, such 3B or 5B is better for them, that is okay too. The point to take away from all this is to understand that certain pencils make darker marks than others.
 |
| Marks of pencils by degrees of softness |
In the illustration above, I have demonstrated the richness of tones of the various pencils using approximately the same pressure on each pencil. As you can see, there is a variance of tonal values in the pencils you use for drawing. For deep and black shadows, or areas of a drawing where it is very dark, you would want to use the 8B or 6B pencils. For lighter shading, such as that in a portrait rendering where often the shadows are very subtle and only faintly dark use the 4B, 2B, and perhaps the HB pencils.
 | |
| Tree Sketch |
In the above drawing of an old tree, I have used HB, 2B, 4B, 6B and 8B. As you can see, the differing grades of graphite pencils are an extremely helpful development for the artist, and make the going easier for the beginner to the most advanced artist. In your hands, you hold magic waiting to be rendered on the drawing board!

Comments
Post a Comment